How to Create a Simple Signup Form in Mailchimp
- By default, Signup Form should be selected in the Forms and Responses Emails dropdown. This is the form we’ll be editing.
- You’ll also notice the Signup Form URL. This is your unique link where the signup form is hosted. This link also comes in handy in that you can visit it while working on your signup form to see the latest changes.
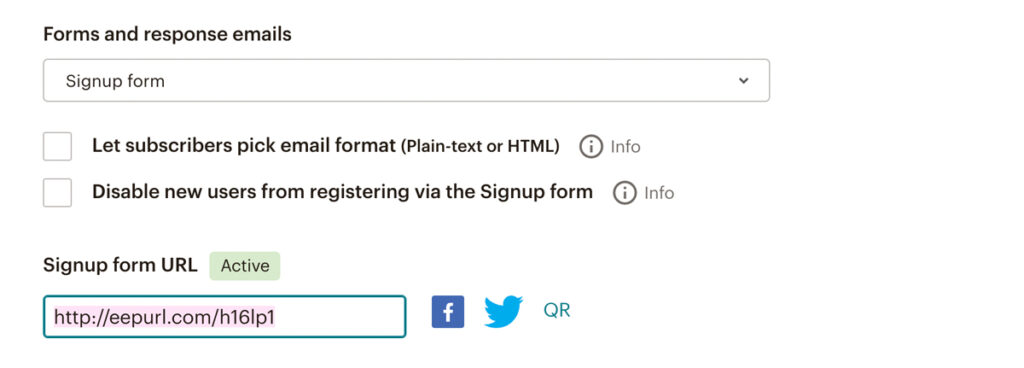
- Further down the page, you’ll see the default signup form that was created when you setup your Mailchimp account.
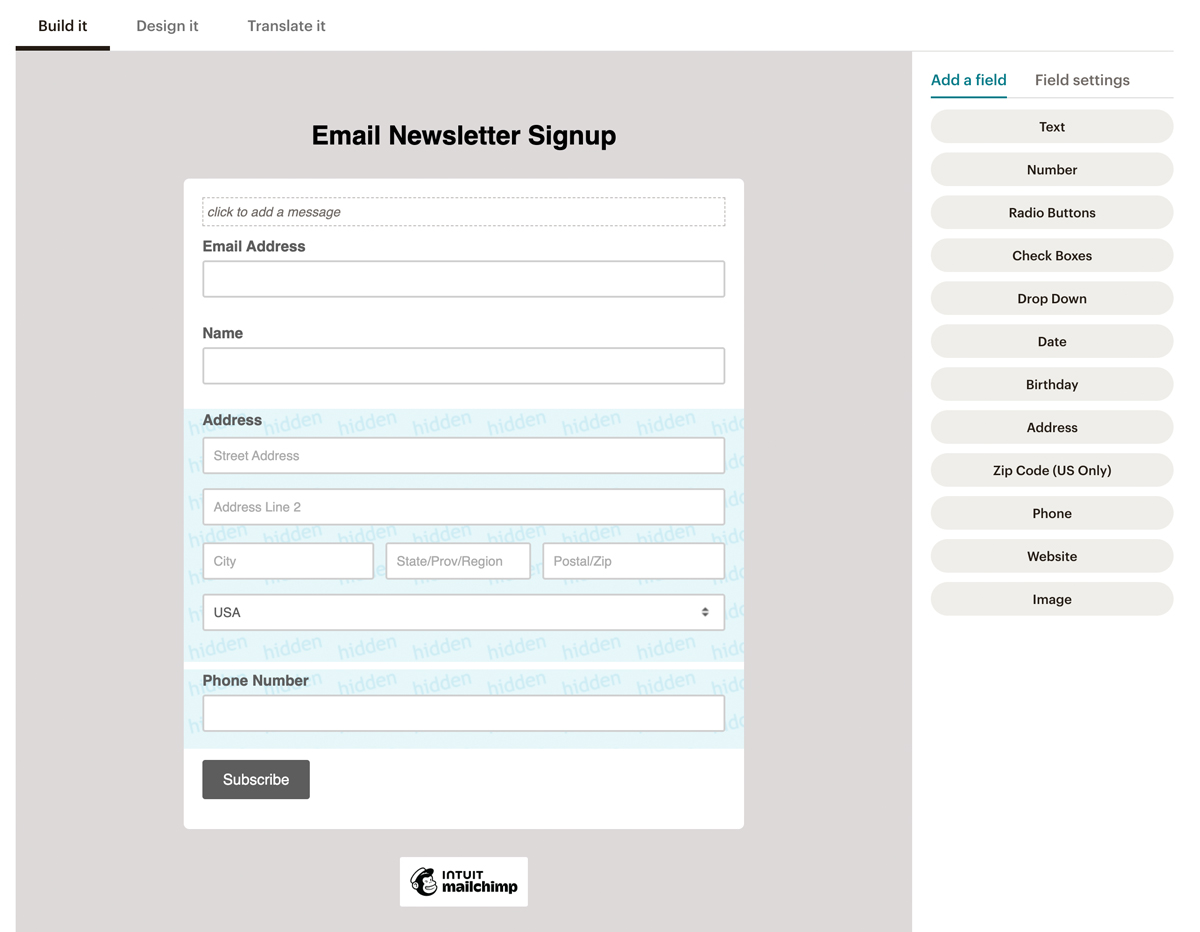
- To make changes to the title, simply hover over it and select one of the three options:
- Edit to alter the text
- Remove to remove the title completely
- Use Image to upload an image such as a logo
- You then have the option to add a message. This is a good place to add more information about your email list and what someone can expect once they signup. Include enticing messaging that outlines the type of value you typically include in your email campaigns such as exclusive deals, priority access to product launches, event invites, free material and so on.
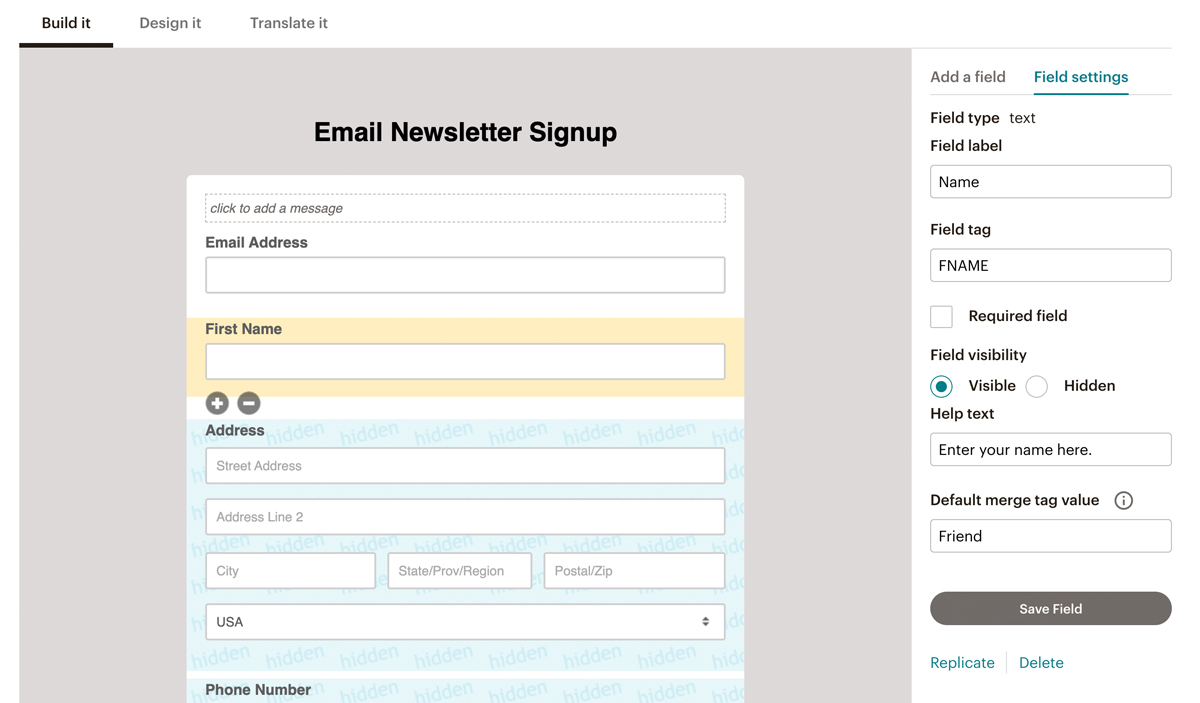
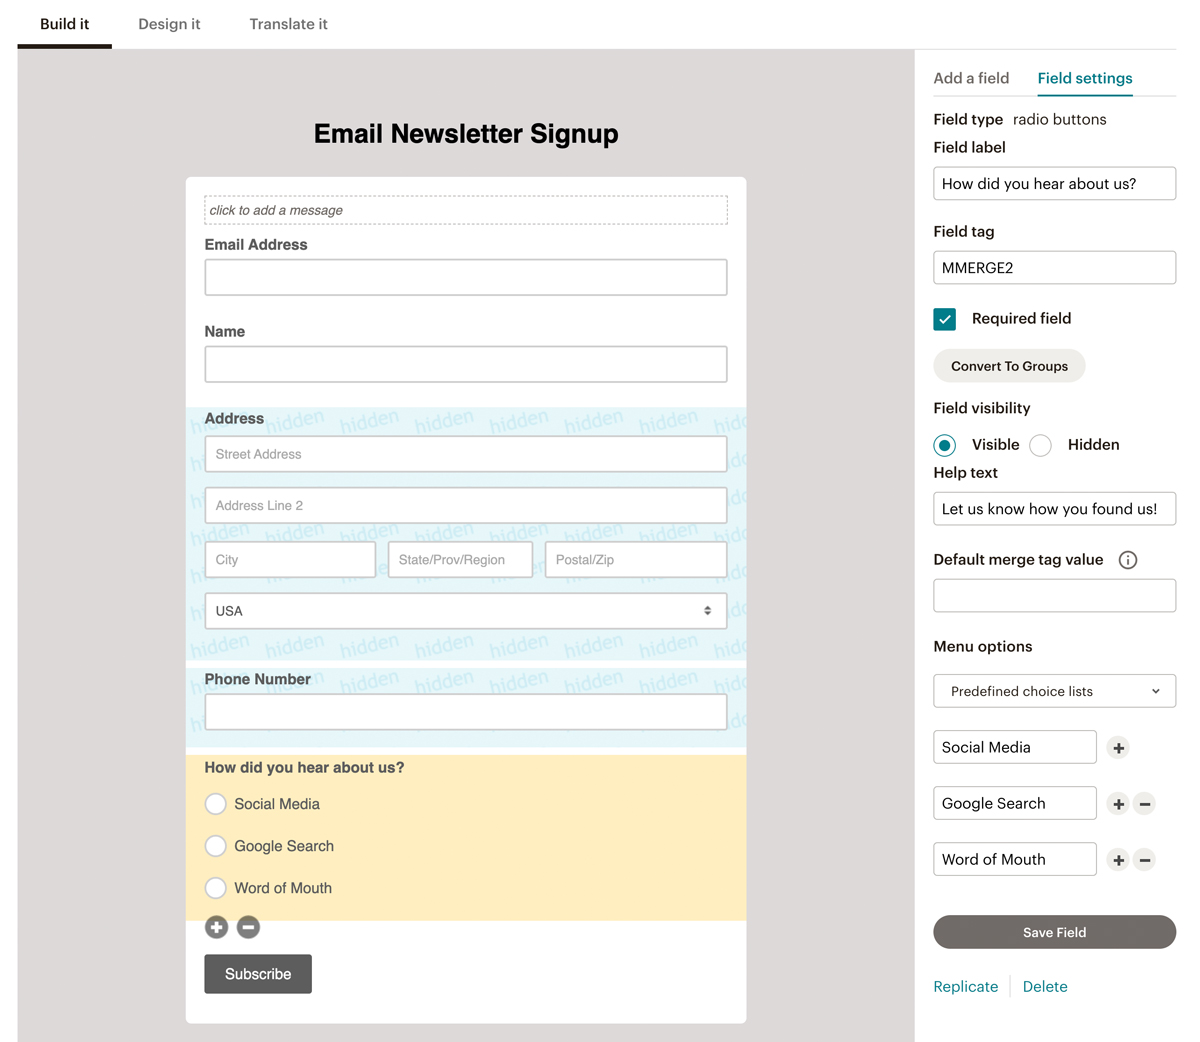
- To edit an existing field, click on it and then make your changes under Field Settings. While editing a field, here are a few things to consider and what each element represents:
- Field Label: The bold title found above the field.
- Field Tag: The field tag is used to identify a piece of information that can be utilized when personalizing your email copy. In the screenshot below, FNAME represents your recipient’s first name. When creating an email campaign, you can insert their first name by saying “Hi, *|FNAME|*!” which, when opened by a recipient who has provided their first name, will appear as “Hi, Scott!”.
- Required Field: Check this box off if you want this field to be mandatory.
- Field Visibility: In most cases, you’ll want to select Visible so that your audience can see the field when filling out your signup form. There are, however, instances where you’ll want to keep a field Hidden. In the screenshot below, the Address and Phone Number fields are hidden. This is because, while you may want to track this information in your contact database, you may not want to include it on a simple signup form.
- Help Text: Use this area to add helpful information and details about the field. For example, if you use the Birthday field, people may wonder why you need that information. You could add text that explains you intend to send them a special gift on their birthday.
- Default Merge Tag Value: Remember the FNAME tag we mentioned earlier? The one you can use to personalize your email copy to call out someone by their first name? In this case, the Default Merge Tag Value outlines what should be used in the event that someone doesn’t enter their first name. If someone does not give their name, Mailchimp will use the word “Friend” instead.
- When you’re done making your changes, hit Save Field.
- To duplicate an existing field, simply click on it and hit Replicate at the bottom of the Field Settings area.
- To remove an existing field, click on it and hit the minus symbol. You can also hit Delete at the bottom of the Field Settings area. It’s very important to note that deleting a form field – whether it be visible or hidden – will delete all associated data in your list. It cannot be undone.
- To reorder any fields found on your signup form, simply drag and drop them into place. Keep in mind that you can preview your changes using your Signup Form URL found at the top of the Form Builder page.
- To add a new field to your form, click on the Add a Field tab. Then, click on the type of field you’d like to add. In the example below, we will add Radio Buttons to help understand where a contact came from and how they found us.
- Under Field Settings, fill in all of the information (similar to the information outlined in step #8 above) including the Menu Options that a user can choose from. Then, hit Save Field to save your changes.
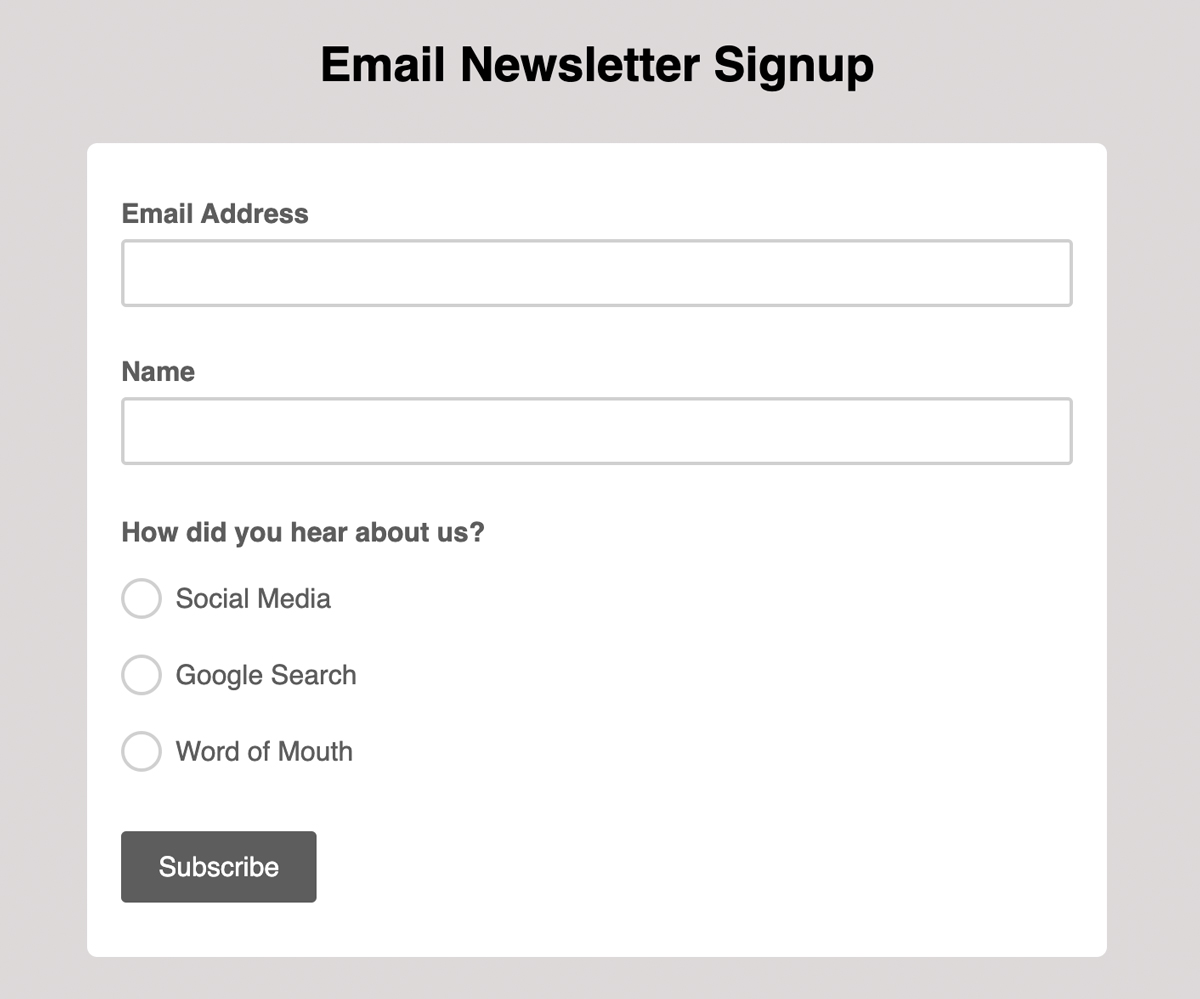
- Add as many fields as you’d like. Once you’re done, visit your Signup Form URL to see what your new form looks like. Remember that any Hidden fields will not be displayed on your live form.
For more step-by-step tutorials, visit our Mailchimp Tutorials page. Plus, signup for our email newsletter below where we share hand-picked marketing resources and more!
Before you go ! Signup for free resources and tutorials to help grow your business online:
I give eStoreKings permission to contact me via email.
